

I lovelovelove the colors in this room! The Newburyport Blue by Benjamin Moore adds such a nice touch of drama and the neutral accessories really compliment the color.
And if you don't have a sun-filled room like the one above, look at how great this paint color still looks under different lighting conditions!
Mom and I have been discussing using this color for her foyer area and downstairs bathroom (one of these days I need to share my parent's house with all of you). Although these areas are still in construction, the foyer has two huge skylights and a lot of extra natural light since it is very open to the rest of the house. The bathroom is completely enclosed and I think with the right accessories this color would be incredibly striking (the white trim would really pop!)
On that note, do you have any favorite colors you'd recommend for a foyer or bathroom? I'd love to hear your suggestions!
Jul 29, 2010


Jul 27, 2010
Cleaning out the Attic
Hello everyone! Sorry I've been MIA lately, last week I was busy doing some major cleaning and organizing with my parents.
My mom and dad live in a wonderful old farmhouse that's been in the family from the beginning, built in 1926. Although the house has been remodeled and added on to, it still retains all of its charm. The only catch? This old farmhouse has an amazing ability to acquire and retain items up in the attic! When you think about how old the house is, it's no wonder there were so many things up there and since the house was in a constant state of remodel for most of my life (and still is, old houses need lots of love!) the most time we spent up in the hot attic was to toss in another knick-knack to get it out of the way of construction.
We originally started the attic clean out project a year ago. We spent roughly two days sorting, organizing and throwing things out (not to mention finding some neat old stuff!) before throwing in the towel. There was way too much to go through! Fast forward to this year and we decided it was time to get serious. We spent 5 entire days cleaning it out. Just think about that for a minute. 5 whole days from morning until night in a hot stuffy attic. 5. Yeah. And believe it or not we're still not done (getting there though!)


It's been completely worth every minute though, and we've found a few things we thought were lost forever, as well as some old things that would be neat for decorating.
So while I'm on this cleaning and organizing kick I thought I'd share a few tips that helped us conquer this monumental task, because when you're staring at a project this huge it is certainly daunting and can make you want to run for the hills.
1. Pick a date (or several) and stick to it! If you put aside time for cleaning in your mind, you'll be mentally prepared for the big day.
2. Get family involved or work with someone else. It's a big job to do by yourself. Even if you have someone just running garbage and recycling down to the cans, it'll be a huge help.
3. Decide how organized you want everything to be. Should everything be perfectly tidy and in place or do you want to just de-clutter so you can quickly find things?
We opted to haul everything out of the attic to organize it once and for all and sort things in the unfinished ad-on space that will someday become a rec-room. We did this simply because the attic was so messy we couldn't walk around in it and the ad-on space was huge and empty with only about 5 steps between it and the attic. If you have tons of stairs to climb up and down however, it may be more beneficial to do your cleaning and organizing within your attic.
Tip: If you take this route and haul everything out, it's a good time to check and see if you have proper insulation in your attic. Proper insulation will help keep your house warm in the winter and cool in the summer and will help you save on energy bills.
4. Go through every single box. Yes it's time consuming (this is the part we're still not done with) but I bet you will find things you thought you lost and also things you probably don't need anymore.
5. Dedicate a space to certain items. In my parent's attic, we made a space for kids toys and games (for the current and future grand kids), home remodel/project items, home decorating items, Christmas decorations, filing and paperwork, a mom/dad pile and a pile for my brother and I (things we haven't taken yet because we're both apartment dwellers with no room - another reason to clean and organize!) Now when we need to find something we know right where to go.
Tip: If you are storing clothes in the attic I'd recommend a cedar chest to ward off critters!
6. Make a garbage/recycle pile (self-explanatory), Ebay/Craigslist pile, and a garage sale/donate pile. Sometimes you find things that you no longer care to keep but may be worthwhile to list on Ebay or Craigslist. We found several pieces of furniture and some neat old items we plan to list. Whatever doesn't sell will then go into the garage sale pile. Why not make a little money for your efforts right? Whatever doesn't sell at the garage sale will be donated.
 Above - a headboard and curved footboard we found.
Looks like someone started stripping it for a project many years ago!
Below - an old trunk. Maybe someone will want it for a coffee table?

As you go through things and determine that you don't want them anymore, see if they can be transformed into something new. We found old candlesticks, picture frames and vases that could be good as new with a simple fresh coat of paint. If you can save yourself money by re-purposing items instead of taking a trip to the store for new items then why not? Just make sure to use them and not let them sit up in the attic again!
If you don't want to hold a garage sale, simply skip that step and donate. The simplest tip is once the item has moved into the garage sale/donate pile it can't come back in! Remember, the point is to de-clutter and organize!
7. Get proper storage. Those plastic rubbermaid tubs really come in handy when organizing an attic, and they stack well. We used a few clear ones for items we'd like to quickly be able to see, as well as some solid ones for items that were sentimental but we probably wouldn't need to be looking at for a while. Boxes work well too and are probably the cheapest option, but keep in mind that attics can be musty and full of bugs and over time the boxes will deteriorate.
8. Ditch it! Speaking of sentimentality, if you have trouble getting rid of items because of the memories behind them, here's a few tips that may help:
For papers, the simple thing that helped me go from about 6 or 7 huge boxes to 2 smaller ones was the fact that while most of the papers were sentimental to me, I didn't want to spend an entire day looking through them every time I wanted to go down memory lane. Time is a valuable thing and while I don't encourage throwing everything out, try to figure out the things that really mean something to you and try to give yourself a box limit. I kept most of the things from my young childhood (mostly because my drawings were so absurd and funny to look at), some things from my middle and high school days, a few more recent papers and lots of artwork. But when the time comes to move again, I don't want to haul around several heavy boxes of old papers so trimming down my collection was beneficial to me.
Tip: Keep a shredder handy for receipts or papers with too much information on them!
For knick-knack items and treasures, there's nothing wrong with hanging on to things that have meaning to you, especially when they've been passed down between family members. The problem comes when you can't let go of anything and you wind up with an attic like ours. Try to look at items objectively. If it really has a lot of sentimental value to you, then are you really honoring it by keeping it couped up in an old dusty attic only to look at it once every 5 years? Maybe it's your grandmother's old mirror you can't bear to part with, or your father's vintage telephone. Why not let everyone admire these items? After all you think they're really neat right? Bring them down into your house and make a statement out of them!
For items you'd like to have a memory of but are taking up too much space, take a photo of them and then decide if you want to sell them or donate them.
9. Last but not least, if you haven't used or thought about an item in the last 5 years or so you probably aren't going to miss it. Harsh I know, but if the point is to clean things out, this tip will be your best friend.
My mom and dad live in a wonderful old farmhouse that's been in the family from the beginning, built in 1926. Although the house has been remodeled and added on to, it still retains all of its charm. The only catch? This old farmhouse has an amazing ability to acquire and retain items up in the attic! When you think about how old the house is, it's no wonder there were so many things up there and since the house was in a constant state of remodel for most of my life (and still is, old houses need lots of love!) the most time we spent up in the hot attic was to toss in another knick-knack to get it out of the way of construction.
We originally started the attic clean out project a year ago. We spent roughly two days sorting, organizing and throwing things out (not to mention finding some neat old stuff!) before throwing in the towel. There was way too much to go through! Fast forward to this year and we decided it was time to get serious. We spent 5 entire days cleaning it out. Just think about that for a minute. 5 whole days from morning until night in a hot stuffy attic. 5. Yeah. And believe it or not we're still not done (getting there though!)

Above - An after picture (sort of). You couldn't walk through this room without running into at least 50 things. The boxes in the middle are mostly empty or need to be sorted and the old truck fenders on the left will be leaving soon. We were really surprised by how much room there actually was in there and we thought of a few ideas for this space for the future (stay tuned!)
Below - This part of the attic is partially insulated/drywalled and looking much much MUCH better than it did (wish I would have taken before pictures!) although there's still a bit more to do.

It's been completely worth every minute though, and we've found a few things we thought were lost forever, as well as some old things that would be neat for decorating.
So while I'm on this cleaning and organizing kick I thought I'd share a few tips that helped us conquer this monumental task, because when you're staring at a project this huge it is certainly daunting and can make you want to run for the hills.
1. Pick a date (or several) and stick to it! If you put aside time for cleaning in your mind, you'll be mentally prepared for the big day.

2. Get family involved or work with someone else. It's a big job to do by yourself. Even if you have someone just running garbage and recycling down to the cans, it'll be a huge help.
3. Decide how organized you want everything to be. Should everything be perfectly tidy and in place or do you want to just de-clutter so you can quickly find things?
We opted to haul everything out of the attic to organize it once and for all and sort things in the unfinished ad-on space that will someday become a rec-room. We did this simply because the attic was so messy we couldn't walk around in it and the ad-on space was huge and empty with only about 5 steps between it and the attic. If you have tons of stairs to climb up and down however, it may be more beneficial to do your cleaning and organizing within your attic.
Tip: If you take this route and haul everything out, it's a good time to check and see if you have proper insulation in your attic. Proper insulation will help keep your house warm in the winter and cool in the summer and will help you save on energy bills.
4. Go through every single box. Yes it's time consuming (this is the part we're still not done with) but I bet you will find things you thought you lost and also things you probably don't need anymore.
Tip: If you are storing clothes in the attic I'd recommend a cedar chest to ward off critters!

6. Make a garbage/recycle pile (self-explanatory), Ebay/Craigslist pile, and a garage sale/donate pile. Sometimes you find things that you no longer care to keep but may be worthwhile to list on Ebay or Craigslist. We found several pieces of furniture and some neat old items we plan to list. Whatever doesn't sell will then go into the garage sale pile. Why not make a little money for your efforts right? Whatever doesn't sell at the garage sale will be donated.
 Above - a headboard and curved footboard we found.
Looks like someone started stripping it for a project many years ago!
Below - an old trunk. Maybe someone will want it for a coffee table?

As you go through things and determine that you don't want them anymore, see if they can be transformed into something new. We found old candlesticks, picture frames and vases that could be good as new with a simple fresh coat of paint. If you can save yourself money by re-purposing items instead of taking a trip to the store for new items then why not? Just make sure to use them and not let them sit up in the attic again!

If you don't want to hold a garage sale, simply skip that step and donate. The simplest tip is once the item has moved into the garage sale/donate pile it can't come back in! Remember, the point is to de-clutter and organize!
7. Get proper storage. Those plastic rubbermaid tubs really come in handy when organizing an attic, and they stack well. We used a few clear ones for items we'd like to quickly be able to see, as well as some solid ones for items that were sentimental but we probably wouldn't need to be looking at for a while. Boxes work well too and are probably the cheapest option, but keep in mind that attics can be musty and full of bugs and over time the boxes will deteriorate.
8. Ditch it! Speaking of sentimentality, if you have trouble getting rid of items because of the memories behind them, here's a few tips that may help:
For papers, the simple thing that helped me go from about 6 or 7 huge boxes to 2 smaller ones was the fact that while most of the papers were sentimental to me, I didn't want to spend an entire day looking through them every time I wanted to go down memory lane. Time is a valuable thing and while I don't encourage throwing everything out, try to figure out the things that really mean something to you and try to give yourself a box limit. I kept most of the things from my young childhood (mostly because my drawings were so absurd and funny to look at), some things from my middle and high school days, a few more recent papers and lots of artwork. But when the time comes to move again, I don't want to haul around several heavy boxes of old papers so trimming down my collection was beneficial to me.
Tip: Keep a shredder handy for receipts or papers with too much information on them!
For knick-knack items and treasures, there's nothing wrong with hanging on to things that have meaning to you, especially when they've been passed down between family members. The problem comes when you can't let go of anything and you wind up with an attic like ours. Try to look at items objectively. If it really has a lot of sentimental value to you, then are you really honoring it by keeping it couped up in an old dusty attic only to look at it once every 5 years? Maybe it's your grandmother's old mirror you can't bear to part with, or your father's vintage telephone. Why not let everyone admire these items? After all you think they're really neat right? Bring them down into your house and make a statement out of them!

For items you'd like to have a memory of but are taking up too much space, take a photo of them and then decide if you want to sell them or donate them.
9. Last but not least, if you haven't used or thought about an item in the last 5 years or so you probably aren't going to miss it. Harsh I know, but if the point is to clean things out, this tip will be your best friend.
Jul 15, 2010
As luck would have it...
Someone threw out a queen size headboard yesterday and I just happened to be taking the trash out and spotted it. Actually, there was an entire bed in the trash area, a metal frame, side rails and a footboard, but it was all pretty badly damaged. I love the people here! Some might cringe at the thought of grabbing something from the trash area, but with a quick wipe down the headboard was looking good as new, and all it had on it was a tiny scratch on the left side (easily covered over by a wood marker).
 Have you seen the photo consultation I did for my friend? I think this headboard would work perfectly in her room! It's not exactly the conventional way of decorating but hey, she's happy and I'm happy to have stumbled upon this trash to treasure piece at just the right time!
 Have you seen the photo consultation I did for my friend? I think this headboard would work perfectly in her room! It's not exactly the conventional way of decorating but hey, she's happy and I'm happy to have stumbled upon this trash to treasure piece at just the right time!
Jul 13, 2010
DIY - Revamped Pillows with Imperial Trellis Print
I love Kelly Wearstler's style. An award winning interior designer, she's done projects all over the world and one of her famous patterns, Imperial Trellis, can be seen as wallpapers, fabrics and even clip boards and trash cans.
I've been slowly putting together our living room area and quickly fell in love with her Imperial Trellis II print in Java after seeing this photo:
 {Uploaded by Suzie on DecorPad.com}
But of course, the fabric is way way WAY out of my price range, the cheapest I could find it was $105.99 a yard. I could have bought the pillows here or here from one of these fabulous Etsy sellers and in hindsight that probably would have been the best way to go (Sometimes DIY projects take quite a bit more time than expected to complete!).
But since I had a few things I could make pillows with lying around the apartment, I decided to make them myself. I used a white tablecloth (one of the same ones I used for my balcony curtains) bought from Ebay several years ago for $7-$10 each. I also had 4 of these blue pillows.


I then purchased some Americana acrylic paint in Bittersweet Chocolate, some Fabric Painting Medium and a little stencil sponge tool (came in a two pack) from the craft store. The Fabric Painting Medium can be used with any acrylic paint to make it usable for fabrics. You just have to let the fabric dry for 24-48 hours after painting and then heat-set it for 30 seconds and you're done! It's even washable!

Using the Imperial Trellis design, I used 6 sheets of 100lb card stock and made a template.

Then I painted in the design. For the first pillow I just painted right over the template and then quickly discovered that the paint was moving around ever so slightly so I had to go back and fix a lot of it. For the rest of the pillows, I lightly traced the template design onto them with a pencil and painted them in with a brush.


I've been slowly putting together our living room area and quickly fell in love with her Imperial Trellis II print in Java after seeing this photo:
 {Uploaded by Suzie on DecorPad.com}
But since I had a few things I could make pillows with lying around the apartment, I decided to make them myself. I used a white tablecloth (one of the same ones I used for my balcony curtains) bought from Ebay several years ago for $7-$10 each. I also had 4 of these blue pillows.

First, I took the trim off the pillows:

Then I cut up my tablecloth into 18.5 inch squares (to allow 1/4 inch for seams).

I then purchased some Americana acrylic paint in Bittersweet Chocolate, some Fabric Painting Medium and a little stencil sponge tool (came in a two pack) from the craft store. The Fabric Painting Medium can be used with any acrylic paint to make it usable for fabrics. You just have to let the fabric dry for 24-48 hours after painting and then heat-set it for 30 seconds and you're done! It's even washable!

Using the Imperial Trellis design, I used 6 sheets of 100lb card stock and made a template.

Then I painted in the design. For the first pillow I just painted right over the template and then quickly discovered that the paint was moving around ever so slightly so I had to go back and fix a lot of it. For the rest of the pillows, I lightly traced the template design onto them with a pencil and painted them in with a brush.

I decided to use white for the backs because painting took quite a bit of time. Since I used a tablecloth that was thick, the blue pillows underneath don't show through, and neither do the lumps!


Ta da!

Cost Breakdown:
$6.54!
Doing this project from scratch would run about $15-20 + four pillows.
Once again:

4 Pillows - reused
1 White tablecloth - re-purposed (you can get them for $7-10 on Ebay)
Acrylic Paint x 2 - $1.29 each
Fabric Painting Medium - $1.99
Foam Brush - $1.97
100 lb Cardstock - Already had for a school project but I bought it at Kinko's for 20 cents a sheet
Total:1 White tablecloth - re-purposed (you can get them for $7-10 on Ebay)
Acrylic Paint x 2 - $1.29 each
Fabric Painting Medium - $1.99
Foam Brush - $1.97
100 lb Cardstock - Already had for a school project but I bought it at Kinko's for 20 cents a sheet
$6.54!
Doing this project from scratch would run about $15-20 + four pillows.
Once again:

Jul 4, 2010

Are you struggling with how to decorate your space? Want to do-it-yourself but need a little help along the way?
I'm excited to offer decorating consultations via email to those who need help with areas in their homes.
I offer three affordable options:
 Have a design dilemma and need some advice? Supply me with a few photos of the room in question along with the problem you're having and I'll email you a written solution. I'll send you a list suggesting ideas for furniture placement, finding new furniture and accessories or re-purposing items you already have, color choice ideas, shopping resources, decorating tips and the thought process behind all of my suggestions.
 $30 per room
Written Consultations are completed within 1 week of when your email, questionnaire and payment are received. Scroll to the bottom for info on how to receive a consultation.

Need help brainstorming ideas for a particular room? Supply me with a few photos of your room and fill out a questionnaire with details about your likes and dislikes, your decorating tastes and your budget and I'll send you a customized “virtual” mood board to serve as an affordable plan for changing the look of your space. I'll include furniture options, lighting ideas, floor, window and wall treatments, color schemes and accessory suggestions to help transform your space.
Along with the mood board, I'll include a written explanation of the plan as well as prices for the items and where to find them. Whether you're starting fresh or working around items you treasure and love, your custom mood board will be suited to your needs.
$75 per room
Mood Boards are completed within 1 week of when your email, questionnaire and payment are received. Scroll to the bottom for info on how to receive a consultation.


Entryways are the first impression people get when entering your house. Hallways connect spaces and are often indications of what's to come. With a photo consultation you can discover the amount of potential and impact your small space really has.
Along with the consultation, I'll include a resource list, prices for each item, and a written explanation of my plan.
$45 per room
Photo Consultations are completed within 1 week of when your email, questionnaire and payment are received.

Your virtual plan will also show you how to visually change the proportions of an awkward space, how to play up the good features in your room while disguising the bad, how to achieve the atmosphere you desire and how to make the most of what you already have, giving you the confidence and path to follow to to give your space your signature style.
$125 per room
Photo Consultations are completed within 1 week of when your email, questionnaire and payment are received. Scroll to the bottom for info on how to receive a consultation.
Here are some examples of rooms before and after one of my photo consultations:


TO RECEIVE A CONSULTATION:
Email Monica at hirondellerustique@gmail.com
What to send via email:
- Photos of your room (preferably one of each wall and 2-3 overall room shots)
- Your budget
- Measurements of your room (a quick sketch is helpful). Include length of walls, location and size of windows, doors and built ins, and where power outlets and heating or air vents are located.
- Ceiling height
- Inspiration – Any photos or links you've collected of decorating ideas you like and represent your style. Don't worry if you're not sure what your style is, that's what I'm here for to help you figure out!
Once I receive your email, I'll send you a lifestyle questionnaire to help me learn a little more about you and your decorating tastes, as well as an invoice for the total amount.
My consultation prices are for one room/area only (for open floor plans, please choose one space to receive a advice on, for example the dining room OR the living room), however if you'd like to purchase more than one room I do offer a 15% discount for purchasing more than one consultation.Payment:
Since these are custom consultations I do require payment upfront. I accept PayPal, Money Orders and Personal Checks. For PayPal and US Postal Money orders I can begin the consultation immediately, checks and regular money orders will require 7 days to clear. If you have any other questions feel free to email me and I'd be happy to answer them for you.
Thanks!
Jul 1, 2010
Giveaway Winners!
Thank you all for participating in my giveaway! As promised, here are the three winners chosen via Random.org:


That's mrso', wifeplzak andKaty! Congratulations!
If you didn't win you can still receive a free 5x7 print with any purchase from my Etsy shop!
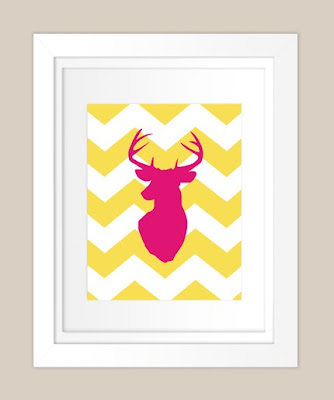
In other etsy news, here are some new prints recently released in my shop:
These 8x10 silhouette prints with a chevron background are great for adding a pop of color to your room without breaking the bank and are completely customizable to colors of your choosing! I can even make them in larger sizes if needed.
Deer
Dachshund

Beetle

Butterfly

Climbing Trees is a limited edition print of 50.
Climbing Trees

If you didn't win you can still receive a free 5x7 print with any purchase from my Etsy shop!
In other etsy news, here are some new prints recently released in my shop:
These 8x10 silhouette prints with a chevron background are great for adding a pop of color to your room without breaking the bank and are completely customizable to colors of your choosing! I can even make them in larger sizes if needed.
Deer

Dachshund

Beetle

Butterfly

Climbing Trees is a limited edition print of 50.
Climbing Trees

Subscribe to:
Posts (Atom)
